Sunday, January 5, 2025

Installing subroadbed and roadbed

Over the past month I finished the benchwork and fascia as well as most of the subroadbed and roadbed.  The main and passing track on the Monson Village section are on a removable 8' piece of plywood topped with cork, so i'll be able to install track and feeders with this piece on a table or workbench before installing it permanently on the layout.  In the meantime the roadbed and foam scenery inserts are loosely in place so that I can mark the track lines. Ignore the extension cord in the foreground of the photo below - it is just temporary power for the layout lighting. Cork pads will be added on top of the foam to support the sidings for the engine house, turntable and car shed. 

To the left of the Monson Village section will be the siding and warehouse serving the Portland-Monson Slate Co's Farm Quarry, and the grade crossing and small shanty at Day's Crossing.  I peeled up the cork roadbed from the previous layout and filled in a lot of gaps with foam pieces, with a coat of DAP Fast 'n Final to smooth the surface where the new track will go. 

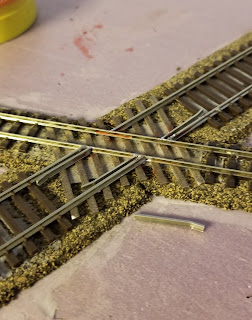
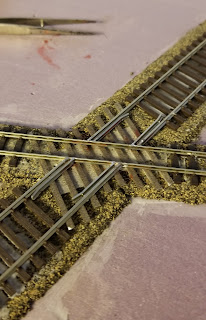
Fast 'n Final is a fantastic skim coat for scenery but it takes several days to set completely, so I won't be able to do the final sanding of this area until the end of the week, but I've mocked up the mainline and siding with the cork roadbed and a piece of flextrack.  The road crossing will go immediately to the left of where the railroad crossing was previously.


Sunday, December 15, 2024

Kingfield Powder House

I have a bunch of kits waiting to be built, some for the new Monson RR layout and others for a potential future SR&RL layout.  I built this one a couple of years ago but never got around to posting photos. It's the Kingfield powder house kit from Portland Locomotive Works.  The prototype was located north of the SR&RL engine house for most of its life. 

The kit went together quickly, beginning with framing out and installing the windows and doors. Here you can see the interior dividing wall too, along with the rafters and trim pieces.  


The window frames, doors, and trim were painter after the walls were assembled.  The shingle material for the walls was painted to represent weathered cedar before cutting the strips from the sheet. A few strips were given minimal weathering to go under the eaves, where they would have some protection from the elements, and the lowest were weathered more heavily to go near the ground.


The roof was covered with the "rolled roofing" strips provided in the kit. I dusted the roof with some "medium gray" weathering powder from Monroe Models. 


The powder house and the other Kingfield structures I've built are now on permanent loan to another modeler, so I'm looking forward to seeing them on his layout at some point.


Friday, October 18, 2024

New Construction -- and a New Blog Name

No, I'm not building a new house - and ours is definitely not "new construction" having been built in 1892!  But I'm off to a good start with the new layout sections.  The 18" x 96" Monson village section has been framed out using the same construction techniques that were used on the existing layout sections, but it won't be installed until the upper valance and backdrop are in place and painted.  Those pieces are cut and primed, and the backdrop might get a base coat this week.

The photo below shows how the new sections will be supported. The upper valence/shelf will be extended around the room to support the upper fascia and provide additional storage, but this time instead of using shelving tracks I'm suspending a 20" shelf (i.e. 2" deeper than the benchwork to allow for good foreground lighting) from the ceiling joists using the threaded rods seen here.  As I did previously, the backdrop will be free floating and will be sandwiched between the benchwork and upper shelf and the wall. The rectangle made of furring strips is to prevent the backdrop from bowing out into the window well.

Meanwhile I've decided to keep updating this blog rather than starting a new one, and have renamed it "HOn30 to the Quarries" in homage to Robert Jones and his book on the Monson RR, "Two Foot to the Quarries."  Eventually I might get a new URL and have this one redirect, but I'll stick with the old URL for now.

Sunday, October 13, 2024

A New Adventure

With my interest in prototype modeling growing over the past two or three years, this freelanced layout has not been getting a lot of attention. While I like all of the Maine two footers, my two favorites lie at the extremes: the 112-mile SR&RL, modernized with safety appliances in the teens under Maine Central ownership, and the 6-mile Monson RR, which was the remotest of the two footers and never moved on from stub switches and link-and-pin couplers.  

So with the recent and impending release of some of the most iconic Monson equipment and buildings in HO scale, including the Vulcan forneys from Toma Model Works and the combine and Monson Junction station from Otter Creek Construction Co., I've decided to turn my Monson-inspired freelanced layout into an actual portrayal of the Monson Railroad, including the town of Monson with the depot, Maine Slate Co headquarters, and engine house; the slate quarries just outside of town; and the junction with the Bangor & Aroostook 6 miles away.  

Here's the current iteration of new track plan, with the junction replacing the town of Thomaston on the current layout and the railroad wrapping around the walls to end at one of the quarries, with three other quarries represented by sidings - two operational, one not:


The layout would reuse the existing benchwork and even part of the roadbed in the current location of Thomaston, so for the time being Thomaston and the curved trestle will remain in place and connect to new layout sections representing Monson village and the quarries.  The staging yard has already been removed and the adjacent track and fascia sections pulled out in preparation for installing new benchwork:


I might continue this story here or I might start a new blog to document the new layout.  Stay tuned...

Saturday, December 10, 2022

Snow plow

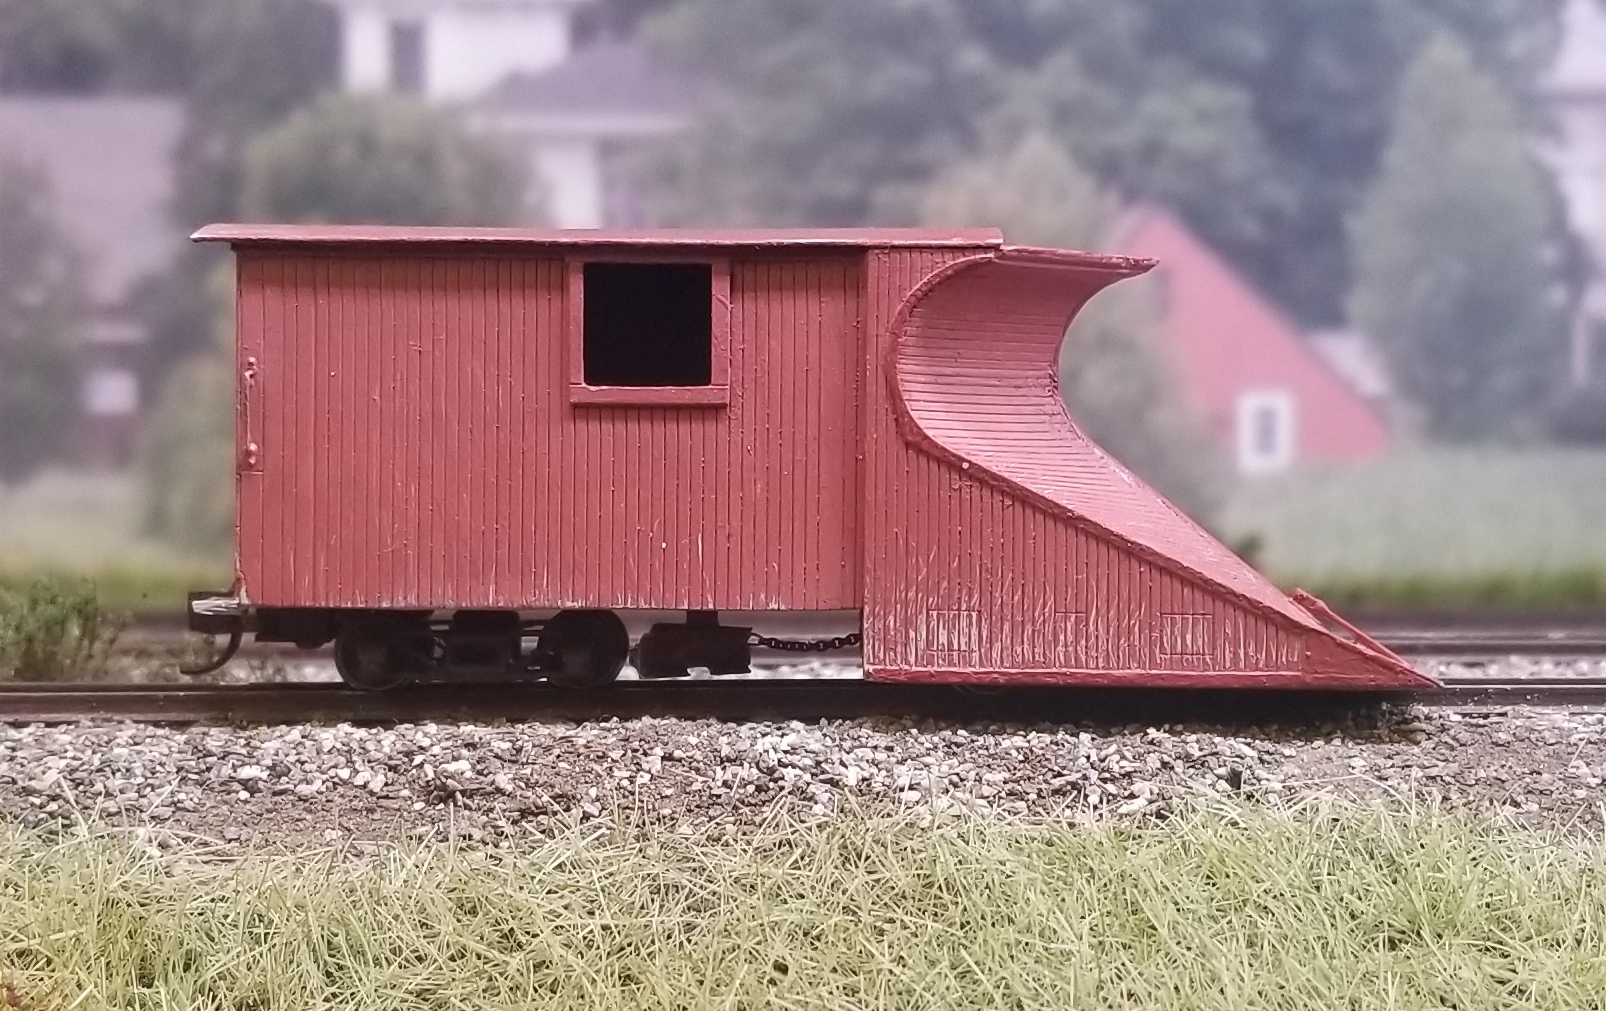
I've been taking a major diversion into 3D printing recently, so while nothing much has been done on the layout, I have been keeping busy.  Here's an HOn30 model of the Monson RR snow plow that I designed and printed on my new Anycubic Mono 4k printer, based on plans by Wes Ewell (link).  The model is assembled from several separate prints, including the chassis, cabin, plow blade, flanger blade, and trucks. I couldn't get the roof to print without warping so it's made from styrene, but I did design a 3D printed jig to ensure that the roof panel installs with the correct overhangs all the way around.

The plow was a challenge to design with all of those boards on the face of the plow.  The ones in the middle actually twisted as they ran across the face, so it took a while to figure out how to design them.  The rest of the design was straightforward although as usual it took a lot of trial and error to get everything to print correctly.

The prototype had a link and pin coupler but I mounted a knuckle coupler in case I ever want to push it around the layout. 


Saturday, March 20, 2021

Installing LED layout lighting

After considering several options for layout lighting I decided to go with LED tape lighting.  LEDs have several advantages over the traditional fluorescent tubes, including more flexible installation and the ability to adjust the color, depending on which type you use.  While LED tape is available for under $20 for a 16 foot length, these cheaper ones are much too dim to light a layout.  Adequate lighting requires at least 300 lumens per foot, which typically costs closer to $3 per foot.

To mimic daylight, it's important to have a high color temperature (around 5000K) and CRI (color rendering index) above 90.  After shopping around for a while I found a 600 LED, 16 ft "daylight white" LED tape that met these criteria.  Coincidentally, right after I found it, I also found a YouTube video showing the same LED tape lights used on a larger layout, so I figured I was on the right track.

I also bought a remote-controlled color-changing 16ft RGB tape from the same manufacturer to install in parallel. The color-changing strip is too weak to light anything on its own but will be useful for color-balancing the white LEDs, and I can also use it for evening/night effects.  In retrospect I wish the RGB LEDs were stronger but they will be adequate for my purposes. 

I could have simply stuck the LEDs to the underside of the shelf above the layout, but I wanted them to be closer to the layout to give a slightly lower angle for foreground lighting.  Since I had two 10' L-girders that were salvaged from a previous layout, I cut them to fit the front edge of the shelving and screwed them to the shelves with the 1x2 flange of the L-girder pointing toward the backdrop.  The high-intensity white LED tape was then attached to the lower edge of the L-girder, while the lower-intensity RGB tape was stuck to the underside of the 1x2 flange. In the first photo below the tape that's hanging down is the end of the RGB tape, which hasn't yet been stuck in place.

A masonite valence was then attached to the L-girder to mask the lighting. 

I applied metal insulation tape to the back of both the L-girder and the edge of the valence to reflect light back onto the layout, both to increase the amount of light and to fill in the foreground.  The shelves overhang the layout by 1.5", which also helps ensure that the front edge of the layout is well lit.


The "daylight white" LEDs appeared a little too harsh to my eye, so I set one of the customizable settings on the RGB strip to a yellowish white to provide a slightly warmer look, as shown below. Other custom settings will be used for dawn, evening, and night effects.

The combination of the high-intensity white LEDs and the RGB LED strip works well and the fascia and valence give a nice "shadow box" effect.  The high-intensity LEDs are definitely strong enough to light this 14"-wide shelf layout on their own, but if the layout were any deeper I would want a second strip about halfway back to light the full depth evenly.  

Saturday, March 13, 2021

Putting it all together

Here's a photo that includes several updates all at once. First, some initial scenery is now in place, including dirt, grass, and ballast in the transfer yard area. Second, in the distance is the freight station, which is now finished and installed. It will be shown more clearly in a future post. Third, I starting making some granite loads that could have been plausibly carried on two-foot flat cars. And fourth, I've been experimenting with LED strip lights for layout lighting, which will also be the subject of a future post.

While Maine granite was popular for buildings, columns, and monuments, other common products included paving blocks and curbstones. These latter products seem more suited to a two-foot gauge railroad and will be the primary cargo on my layout. 

The curbstones shown above were made from basswood and scale out at roughly 9" x 16" x 5'.  Nine inches is too thick for curbstones so in the future I will use thinner stripwood.  I rounded the edges with sandpaper and then dunked the pieces in diluted white primer followed by a dark gray stain to give them the final coloring, and then assembled them into stacks with scale 3X3 blocking underneath.  

The loads shown here would have weighed between 8 and 10 tons by my calculations, which is right around the capacity of a two-foot flatcar. The standard gauge flatcar on the adjacent track is a 50-ton car so several narrow-gauge loads could be transferred to a single standard gauge car.

I plan to make paving blocks the same way.  An HO scale paver would be around 1/16" x 1/16" x 1/8", so for flatcar loads it may be easier to carve a larger basswood block to represent layers of pavers, instead of making each load from dozens of individual stones.  I'll still need a lot of individual pavers though, since I want to have piles of them lying here and there.  

Sunday, February 14, 2021

Finishing the backdrop, part two: the town scene

I wanted to include some town buildings on the backdrop behind the Thomaston station, freight house, and transfer tracks, so I chose a backdrop from LARC Products called "Steeple" that had several wood-framed houses and a church in the mid-distance, with a meadow in the foreground.  There were two complications to deal with on this section.  First, the tall foreground trees meant for a lot of finicky knife work to remove the sky portion. It took nearly seven hours just for this 9' section, spread out over several evenings.

Second, the sky in the "Steeple" image is very pale, almost white in fact. Even though I'm removing the sky portion, the hints of sky visible through the tree branches were too much of a contrast with the blue that was used to paint the sky, so I decided to repaint the sky to be much paler toward the horizon.

This time I used three colors: the same Benjamin Moore "aqua marina" and "jet stream" plus a 1:1 mix of "jet stream" and white for the lowest band. The bands were brushed on and then blended while still wet.  Here's how the bands looked before and after blending; the colors look different because the "before" photo was taken at night under room lighting while the "after" photo was taken with daylight coming in the windows.


After the new sky dried the background image was applied. LARC offers three choices of material: a 4 mil vinyl, a 7 mil polyester they call "Fab-Tex", and a more rigid 10.5 mil "anti-curl" material. The first two are self-sticking.  I chose the 7 mil polyester and was glad to find that it was very forgiving. It practically smooths itself during application, and it's even re-positionable so that you can take it up and reapply it if you do it wrong the first time (which I certainly did!). Here's the result:


Most of the buildings look appropriate for the late-twenties to my eye, with the exception of a couple of houses behind the station that have a more modern swing set and pool that will need to be hidden by foliage. Also, the beige building between the transfer crane and freight house is reasonably period-appropriate but somewhat distracting, so I will use small trees to partially hide it.

I'm really pleased with how the backdrop turned out. While I would hesitate to use the sky-removal technique on a larger layout, for a small shelf layout like this one it was manageable.  

Saturday, February 13, 2021

Finishing the backdrop

Before starting the scenery I wanted to add some landscape features to the backdrop. I like the look of photo backdrops, so I bought two backdrops from LARC Products: one for the town and another for the more rural scene with the trestle and crossing. I had LARC re-size their stock images based on some digital mock-ups, and also asked them to flip the rural backdrop because it looked better that way.  They were great to deal with and turned around revised proofs very quickly. I would definitely use them again in the future, particularly since they have such an extensive collection of stock images.

The two backdrops had very different sky colors, so I cut off the sky from each of them and pasted the landscape onto the existing painted sky backdrop. The LARC material is self-adhesive so installation was very easy. Removing the sky from the rural section went relatively quickly, but the town scene was more complicated - that will be the subject of another post.  I had the best luck using curved cuticle scissors to cut along the sky line and then a brand-new #11 blade to do the detail work, especially around the large tree on the left. 


The standard gauge track running into the backdrop will be at least partially masked by trees and tall grasses.  For the area behind the trestle, I plan to add a photo of a stream, using foliage to mask the edges of the photo. The next photo shows a mock-up of that scene using a black-and-white copy of the creek photo. I wasn't thrilled with how the original backdrop looked in this area so I'm also testing an unused scrap of backdrop to see if it would look better, which I think it does.


Saturday, February 6, 2021

Two new boxcars (or is it three?)

Needing a couple more boxcars, I ordered two Kennebec Central boxcar kits from Mt. Blue Model Co.  Why KC and not an SR&RL prototype like the boxcar already on the roster (#35)?  The shorter length and more basic look of the KC cars is more in keeping with the idea of a less-developed railroad like the Kennebec Central or Monson RR, compared to the boxcars used in the later decades of the SR&RL.  A side benefit is that the KC cars are quicker to build since they only had a couple of grab irons, no stirrups, and handbrakes instead of air brakes.

The new cars were numbered 23 and 24.  For variety, I weathered #23 heavily but left #24 pristine, as if it was recently repainted.  To reinforce that idea I used a smaller font on #24:

The idea to use smaller lettering on the "repainted" car didn't occur to me until after I had already lettered one side.  After debating which side I liked better, I had another idea: since the layout is a shelf layout and only one side will be seen during an operating session, why not number the two sides differently, so that the car can be flipped around occasionally to represent a different car?  So the number on the reverse side was changed to 25, giving me three cars for the price of two!

As with all of my freight cars, the trucks are from Marsh Creek Miniatures and were 3D printed by Shapeways.  Some two-foot freight cars only had brakes on one truck, so to replicate that look I removed the brakes and frame extensions from one truck on each car.  

The Marsh Creek trucks are designed for Fox Valley Models 36" N scale wheelsets (20" in HO) with .540" axles. The FVM wheelsets are hard to find at the moment, but I learned from another modeler that Eastern Seaboard Models is now producing wheelsets of the same dimensions.  I ordered some to try on these cars and they look good and roll well, so it's great to have an alternative to the FVM wheels.


Monday, January 25, 2021

Adding a staging yard

My original track plan included additional sections for the harbor town of Tennant's Harbor (now spelled Tenants Harbor) and a quarry.  Since I won't get around to building those sections for a while (if ever!), I added a four-track staging yard to allow me to run trains in and out of Thomaston. One track will represent the quarry, two will be reserved for Tennant's Harbor, and the fourth will be an escape track to allow locomotives to run around their trains.  The railbus gets its own cassette so that I don't have to dedicate an entire track to it.

I used Kato N scale unitrack so the tracks can be easily reconfigured in the future.  The unitrack is code 80 which matches the Peco track used on the rest of the layout, so I simply soldered a short piece of unitrack to the adjoining flextrack and then connected the staging yard to that piece.  All of my locos and rolling stock handle the #6 turnouts without problems, and the turnouts are power-routing so electricity is only fed to one track at a time.  At some point I may add an electrical control panel but for now I just operate the turnouts manually.

The staging yard runs in front of a window well so there is a fence on both sides to prevent accidents.  At the far end there is a unitrack plate girder bridge that serves as a cassette to turn locomotives.  The unitrack joiners make it easy to align it with the staging tracks.  

The tracks are laid on 1/8" cork that ends just short of the cassette.  There is a sheet of white styrene under the cassette that shims it to match the staging tracks and also makes it easier to see what you're doing as you move the cassette between tracks.  

Sunday, January 10, 2021

Lighting for the freight house

The freight house will have both exterior and interior lighting: an exterior light over the entry door and two overhead lamps inside.  For the exterior light, I used a gooseneck lamp from Woodland Scenics' "Just Plug" series of lighting fixtures. The "Just Plug" system includes a base station that controls the current to each light, and the fixtures have plugs that plug directly into the base station.  Since I don't actually use the "Just Plug" system, I cut off the plug and wired in a 1000 ohm resistor to adapt it to my variable-voltage lighting bus. Here it is hooked up to a 9V battery:

For the interior lighting I used a couple of HO scale spotlights purchased from a Chinese company, also with 1K resistors. Since these lights gave a cool white light, I colored the lenses with a yellow sharpie to warm them up.  When I added lighting to my station I used theatrical lighting filters to adjust the color temperature, but the sharpie is a lot easier!  

In both photos you can see that I'm using yellow/black for the lighting wiring to distinguish it from the track wiring (black/red for the blocks and blue and white for the two cab busses). 

Friday, January 1, 2021

Freight house update

It's hard to believe it's been almost three years since I started the freight house kit from Bollinger Edgerly Scale Trains (see previous post here), but I've been making some progress on it over the past couple of weeks.  Since the building will have lighting, I first installed a floor and added some interior details, including a few piles of crates and barrels from Bar Mills Scale Model Works, a pile of timbers, and a somewhat crude stack of sardine crates carved out of a pine block.

The crates are supposed to be from a cannery at the other end of the line, and they actually have decals on the front that read (note the old spelling of Tenants Harbor):

4 DOZ. TINS – MAINE SARDINES
WEIGHT 10 – OZ. EACH
PENOBSCOT CANNING
TENNANT’S HARBOR ME

Or at least that's what they are supposed to say... My home printer doesn't have anywhere close to the resolution necessary to print the tiny lettering, but they add texture and it was interesting to research what typical sardine crates would have looked like.  Here's how they look through the door, using a flashlight to mimic interior lighting:


The loading dock has over 200 individual pieces but my mini chop saw made quick work of cutting them. The stringers and decking were assembled using a jig to keep everything square.

After installing the legs and bracing I test fit the structure and loading dock sections on the layout, with a narrow gauge flat car and standard gauge boxcar to check heights and clearances. The freight house will sit on a slope, so the timber piers supporting the freight house will need to be 1/4" longer in the back. 


In addition to the structure piers, lighting and roof, there are still a few trim pieces to be installed. It's been a fun kit to assemble so far and it should look good sitting between the station and the transfer crane.

Wednesday, December 16, 2020

SR&RL models

I have been steadily accumulating freight car and structure kits for a future layout based on the Sandy River and Rangeley Lakes, which is my favorite of the Maine two-foot gauge lines. Recently I started building some of them, starting with a few freight cars. The coal gondola is a resin kit from F&C, and the rest are laser-cut kits from Mount Blue Model Co. 


The side and end panels for the rack cars were scratchbuilt from strip wood using this simple jig. A bit tedious but the result was worth it!


I've also been working on models of buildings that were located in Kingfield, Maine, including the wood/tool shed, the hydrant house, and the car repair shop. All three kits were released many years ago and are out of production. The tool shed is by Chris Cardinal, the hydrant house is by Kennebunk Models with modifications to match prototype drawings, and the car shop (still in progress) was produced by Portland Locomotive Works. All are painted in the Maine Central color scheme that was used on the SR&RL following its acquisition by the MEC in 1912.


While these buildings are intended for my next layout I will use them on the current one as well, near the roundhouse which will be scratchbuilt. I still need to reinstall the turntable, which was removed when I moved this section back into the train room.

Tuesday, December 15, 2020

Ball signal

The ball signal is a B.E.S.T. (Bollinger Edgerly Scale Trains) model of the Whitefield Junction signal in New Hampshire. The signal is set to allow the narrow gauge to cross the Maine Central track.  The shack is from Portland Locomotive Works and is based on a structure by Sam Swanson. 


The final step on the crossing was installing the guard rails inside the diamond. Like the other guard rails on the narrow gauge track, it was made using plastic rail to avoid electrical shorts.


Saturday, September 5, 2020

Crossing the standard gauge

Track is now installed on the new section, including the broad 21" radius curve in the corner. I use yardsticks with holes drilled at 1" intervals to lay out my curves.  Here one yardstick is clamped to the benchwork to find the center of the curve in the aisle, and another is being used to mark the track centerline.  The shelf to the right is for the staging yard:

Since the Thomaston station is now located within the town itself, instead of outside of town as I originally planned, the railroad would have had to cross the Maine Central Rockport branch east of town. This could make for a neat scene, with a ball signal to control the crossing, so I decided to include it.

For the sake of reliability, I first glued down the narrow gauge track and then built the crossing in place using code 83 standard gauge track and rail. After laying ties made from styrene strip, the track sections were cut to fit and soldered to the narrow gauge track, and then short pieces of rail were cut, bent, and filed to form the guard rails and soldered inside the standard gauge rails. 


Next the flangeways for the standard gauge were cut into the narrow gauge track using a cut-off disc in a motor tool. Only the head and web of the rail were cut, leaving the base intact to conduct current across the diamond. After cleaning everything up with files and a track cleaner, I got out the rail bus to make sure everything still ran smoothly.   


The final step was installing guard rails on the narrow gauge. To avoid creating a short between the two rails (not an issue with the non-operating standard gauge track) I made these with plastic rail salvaged from the Walthers traveling crane kit that I turned into a stationary crane for the transfer track (see previous post here). After the track is painted and ballasted everything should blend together nicely. 


The ball signal and a maintenance shack are almost finished so I will post a mock-up of the entire scene soon.

Wednesday, August 26, 2020

Extending the layout

The Thomaston section has been sitting on my workbench for nearly two years, but I recently moved it back into the train room after finishing the masonite backdrop on the first two walls.  The sky is blended using two Benjamin Moore colors: "aqua marina" at the top blending into "jet stream" at the bottom.  I applied bands of each using brushes and then blended them with a roller leaving a smooth finish with some streakiness suggesting wispy clouds near the horizon.  Later on I will add photo images of trees and other landscape details. 

The backdrop sits on the shelf brackets and isn't actually attached to anything, just sandwiched between the layout and the wall.  I glued 3/4" styrofoam panels to the back of the backdrop in between the shelving standards so that it stands an even distance from the wall all the way around. Screwing the layout sections to the shelf brackets locks everything in place.

Getting the first section back in place motivated me to work on the second section, which is a largely rural area with no sidings. The open-frame benchwork for this section had already been constructed using my usual technique of a 1/2" birch plywood frame and top covered with 2" foam. One thing I learned when building the first section is to avoid having corner curves cross a section boundary, so I added a small extension to accommodate the entire curve in this corner. 

Ultimately the layout will extend along the right-hand wall to a quarry and harbor scene, but for now I plan to install a staging yard to allow me to run trains in and out of Thomaston.

Thursday, April 9, 2020

Trestle construction, part 3

Here’s the finished trestle. The deck/stringer assembly was installed at the same time as the abutments, and the bents were then glued on from below. I used brown ballast as filler around the abutments and the bases of three of the bents, but it will eventually get covered by the final scenery. The last three bents will be “dirted in” whenever I get around to scenicking the creek.


The metal object between the rails is a RibbonRail gauge:


The abutments I made previously turned out to be too narrow for the approach fills. For the shorter abutment on the right-hand end, I was able to remove the top course from the taller abutment to substitute for the smaller one, but I then had to recast the larger (left-hand) one. The original larger casting was repurposed (upside-down) as a retaining wall, which is visible below the transfer crane in the last photo of the November 29 post.

Saturday, December 21, 2019

Trestle construction, part 2


Getting back to the trestle, I installed the crossties on the deck using scale 8’ lengths of 1/16” square basswood, and outer guard rails made from scale 4x8s with NBW castings every three or four ties.


I also got started on the trestle bents, using 1/8” round stock for the piles, 1/8” square stock for the caps, and scale 2x8 for the braces. All of the wood was cut using a cheap 2” miter saw from Harbor Freight, which makes short work of repetitive cuts and ensures that all of the piles are cut at the correct angle, in this case 0, 5, or 10 degrees. The following photo shows the quick-and-dirty assembly jig I used, and a finished bent (with NBWs) in the upper right.


The piles and caps were stained a darker brown than the trestle deck and the braces.  My thinking was that these pieces might have been creosoted while the rest were left untreated. I'm not sure if that is actually prototypical but I like the contrasting wood tones.